You've seen them — those massive Minecraft builds that look like an entire fantasy city, a sprawling cliffside village, or a futuristic skyline. Maybe you've thought "I want to build something like that," loaded into a creative world, placed about 30 blocks, and quietly closed the game. We've all been there.
Megabuilds aren't impossible — they're just intimidating, because most people skip the planning phase and start placing blocks, then feel overwhelmed when the build starts feeling chaotic.
This guide walks through the same process experienced builders use to plan and execute massive solo projects. Follow these steps and you'll finish builds you actually feel proud of, instead of abandoning half-finished ones every other weekend.
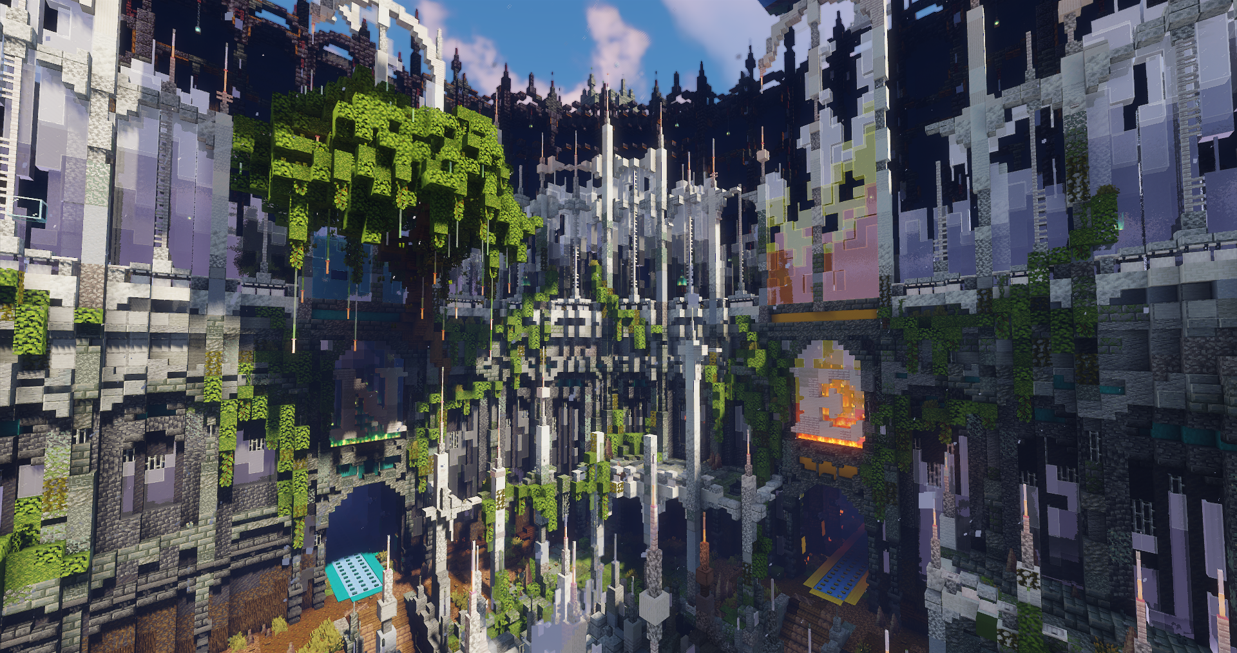
Nether Design: By the Blithe Build Team
Step 1: Lock In a Theme
Every great megabuild starts with a clear theme. Without one, you'll end up building a Victorian manor, then getting bored and starting a sci-fi tower next to it, and by the end nothing reads as a cohesive whole.
Before you place a single block, answer these:
Setting: Medieval, modern, fantasy, post-apocalyptic, futuristic?
Scale: Are you building a single structure, a village, a city, or an entire region?
Vibe: Bright and welcoming? Dark and mysterious? Industrial? Whimsical?
Write the theme down somewhere. Even just a sticky note on your monitor that says "rainy fishing village, late medieval, slightly magical." can make all the difference! That note is your filter for every decision you make from here on out. If something doesn't fit the theme, it doesn't go in the build. The biggest mistake solo builders make is letting the theme drift mid-project. Stay disciplined.
Step 2: Plan Your Palette
Once you've got the theme, the next step is your building palette: the specific blocks you'll use for every part of the build. Decide this before you start placing anything.
Buildings: Wall block, accent block, trim, roof material
Roads and paths: Stone, cobblestone, andesite, dirt paths?
Terrain: Grass and dirt variants, blocks for cliffs, mountains, beaches
Decorative elements: Lanterns, fences, banners, plants
Why this matters: if you make block choices on the fly as you go, your build will feel inconsistent even if every individual structure looks fine. A locked palette is what makes a megabuild feel like a unified place instead of a collection of unrelated projects.
Pro tip: build a small test structure with your palette before committing to the full project. Sometimes blocks that look great in your head don't actually work together once they're placed. Better to find out on a 10x10 test build than 50 buildings deep into a city.
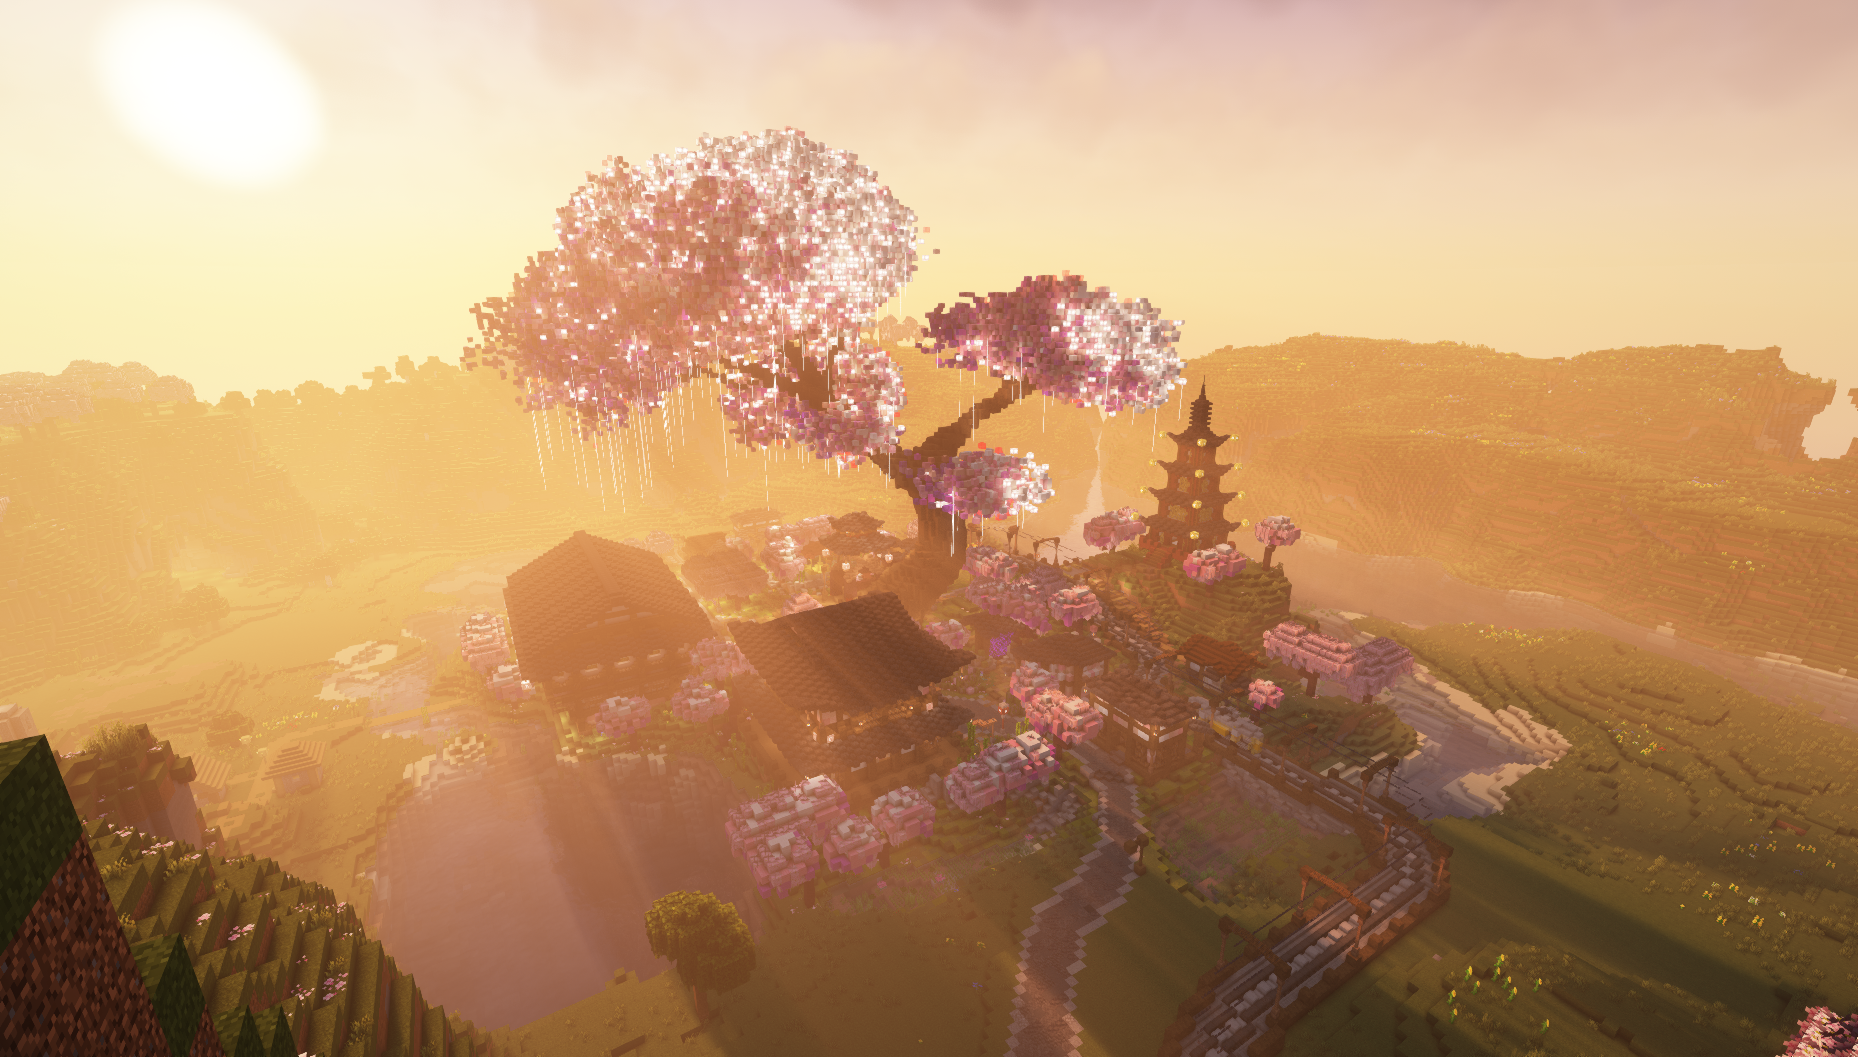
Spawn Design: By the Blithe Build Team
Step 3: Terraform First
This is the step most people want to skip, and it's the step that makes or breaks a megabuild. Terraform before you build.
Flat ground is the death of a great build. Even small elevation changes, a curving river, a hill, or a cliff face will make your build look ten times more dynamic and interesting. The terrain is what gives your build personality — the structures sit on top of that personality.
Some terraforming principles worth knowing:
Vary your slopes. Real terrain isn't symmetrical. Mix jagged cliffs, gentle slopes, and sharp rises in the same area.
Layer your block types. Mix grass, coarse dirt, podzol, and stone variants for visual depth.
Plan for water. Where would water naturally collect? Add ponds, streams, and rivers in low points. Water is one of the easiest ways to make a build feel real.
Don't be afraid to dig down. Cliffs, ravines, and underground areas are some of the most striking parts of any megabuild. You don't have to build everything above sea level.
Take your time here. Terraforming a large area can take hours, but it's the foundation everything else sits on. Rushing it is the equivalent of building a house on sand.
Step 4: Lay Out the Roads and Paths
With the terrain done, plan how people will move through your build. Even if no one but you ever walks through it, thinking about flow forces you to consider what the build is actually for.
Place your roads and paths first, before any buildings. Walk through them at ground level (no flying) and ask:
Where do you arrive when you enter the build?
Where are you trying to get to?
Does the route feel natural, or does it feel like a Minecraft tutorial?
Don't make everything a perfect grid. Real cities have curves, dead ends, narrow alleys, and irregular intersections. That messiness is part of what makes a build feel lived-in. Straight grids feel artificial and boring.
A good trick: imagine the people who "live" here. They'd walk the shortest practical path between buildings, not a perfect rectangle. Let your roads follow that logic.
Step 5: Plan Your Structures Before You Build Them
Once your roads are placed, it's tempting to immediately start placing buildings. Don't.
Instead, mark out the footprints of every structure first — just the outline of where each building will go. You can use any spare block for this (wool, concrete, whatever). Walk through the build with the footprints in place and ask:
Density: Are buildings clustered or spread out? Does it feel right for the theme?
Variety: Do buildings have different sizes and shapes, or are they all similar rectangles?
Sightlines: When you walk down the main path, what do you see at the end? Is there a dramatic structure or focal point?
Purpose: What is each building for? A blacksmith, a tavern, a tower, a house? Knowing the purpose makes detailing way easier later.
Place the footprints first, walk through, adjust, then start the actual structures. You'll save yourself from tearing down half-finished buildings because they ended up in the wrong place.
Step 6: Build Your Structures
Now you can finally start the building part. A few things to keep in mind so you don't burn out halfway through:
Build in passes. Do all the wall structures first across the whole build, then all the roofs, then all the windows and doors. This is much faster than fully completing one building at a time, and keeps the whole build progressing visually.
Vary heights and proportions. Don't make every building two stories tall with a flat roof. Mix tall narrow towers with squat wide warehouses. Add chimneys, dormers, balconies, overhanging second floors.
Break your own symmetry. A perfectly symmetrical building looks artificial. Add a slightly off-center chimney, an addition that was clearly built later, a leaning wall.
Save reference images. Pinterest, Google Images, ArtStation — pull screenshots of real buildings or art that match your theme. Reference is what separates good builders from great ones.
If you hit a wall on a specific building, skip it and come back later. Forcing yourself through a building you're not feeling is how megabuilds die.
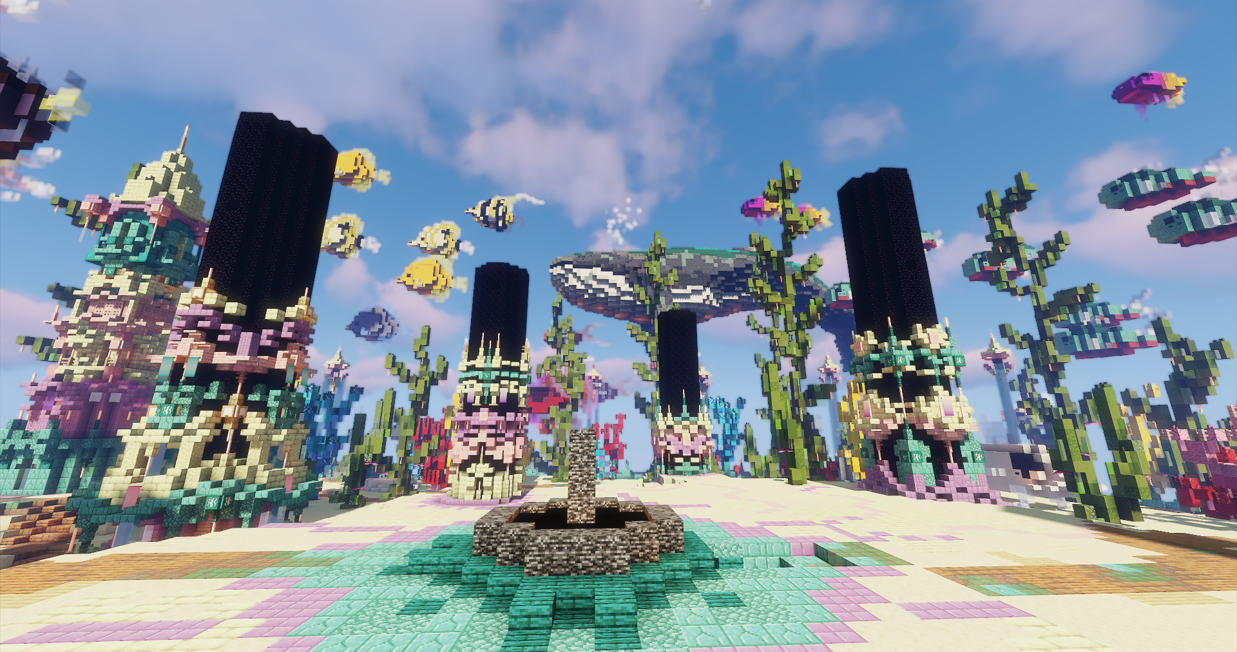
End Island Design: By the Blithe Build Team
Step 7: The Detail Pass
By this point, the bones of your build are done. The terrain is shaped, roads are laid, structures are up. Now comes the part that separates good builds from great ones: the detail pass.
This is where you walk the whole build and add small touches that make it feel alive:
Greenery: Trees, bushes, flower pots, hanging vines, crops in farms
Lighting: Lanterns, torches, candles, glowstone hidden under blocks
Storytelling details: A market stall with crates and barrels. Laundry hung between two houses on a line. A broken cart on the side of the road. A graveyard with named tombstones. Tools left in a workshop.
Wear and weathering: Cracked stone bricks, mossy cobblestone, vines on old walls, broken windows
Negative space: Sometimes the move is to remove clutter, not add it. Empty courtyards, quiet alleys, and open spaces give the eye somewhere to rest.
Walk the entire build at ground level — no flying — and ask "would I believe people actually live here?" Anywhere the answer is no, add detail (or remove clutter) until it is.This is also when you fix things that have been bothering you. Don't be afraid to tear down a structure and rebuild it if it's been nagging at you. The detail pass is your last chance to elevate the build before you call it done.
Step 8: Step Back
Once you think it's done, walk away from it for a day or two. Come back with fresh eyes and walk through the entire build one more time. You'll spot things you missed, areas that feel weak, and opportunities for one or two more details. Make those final adjustments and then call it done.
The Single Biggest Takeaway
Megabuilds are won and lost in the planning phase, not the building phase.
Most failed megabuilds aren't bad because the builder wasn't skilled. They're bad because someone started placing blocks before locking in the theme, the palette, or the layout. Discipline in steps 1 through 5 gives you the freedom to build fast and confidently in steps 6 and 7.
Next time you're tempted to jump straight into placing blocks on a big project — don't. Spend a session or two on the planning steps first. Your future self will thank you.
Now go build something massive.
— The Blithe Team
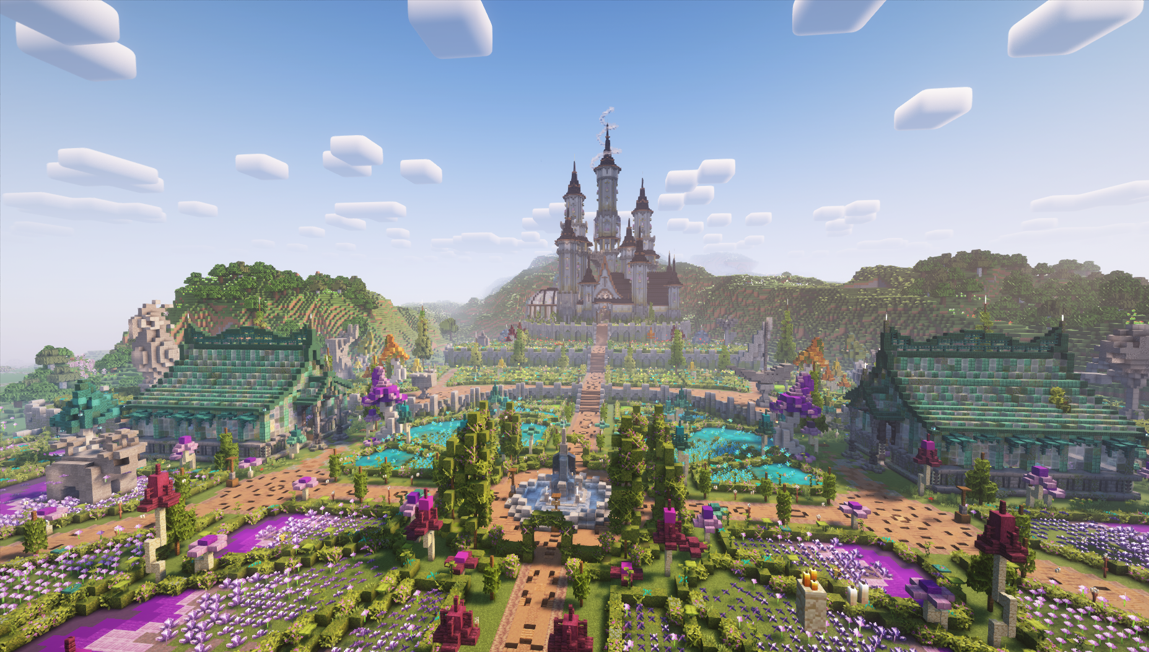
Spawn Design: by the Blithe Build Team


